RobotStudio
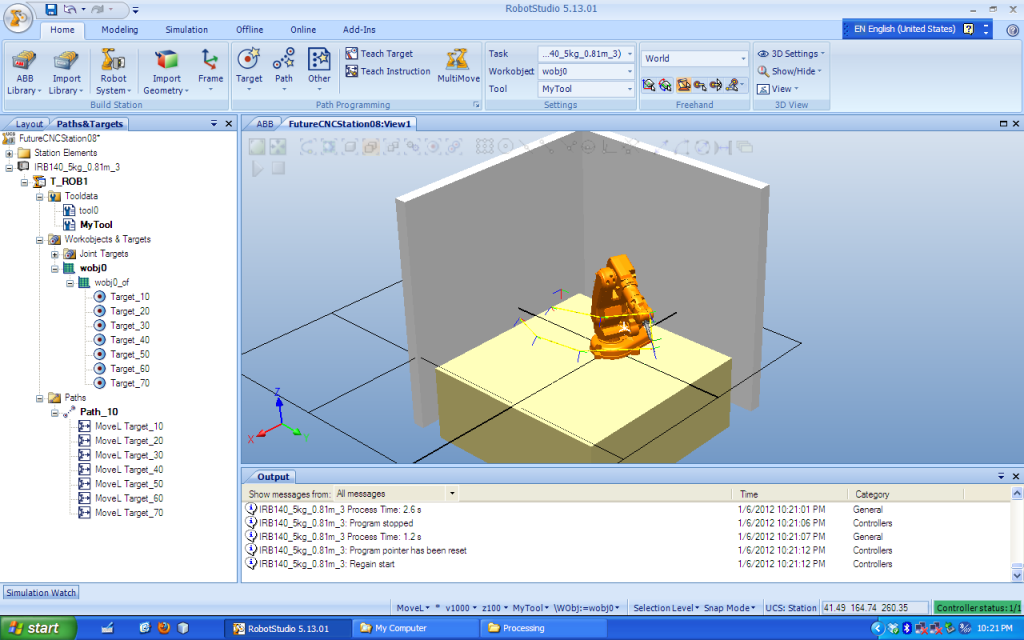
RobotStudio is ABB’s official robotics software that can be used to create a path for the robot to move along and to simulate the robot’s movement. It can also be used for other things like editing RAPID code, but for the most part we will be using it for simulation.
Download
To download RobotStudio (Windows only):
http://downloads.robotstudio.com/robotstudio/RobotStudio_School_Edition_5.13.01.exe
(This is the correct link, ignore the link on the CMU website)
To setup the license follow the instructions here:
http://www.cmu.edu/computing/software/all/robot-studio/installation.html
dFab Small Robot Station
Below is robot ‘station’ file we have prepared that mimics the setup in the small robot room. To load this file, follow the tutorial here.
Download: Future CNC Station v11 (Feb 14, 2012) Updated to include all 16 Digital Inputs
Older Versions: Future CNC Station v10, Future CNC Station v09, Future CNC Station v08
10 Steps to Create a Basic Program
- In the home tab, set the left hand panel to ‘Paths & Targets’
- Select ‘Jog Joint‘ in the ‘Freehand‘ section of the toolbar
- Click and drag the robots joints to move it to any position
- Click ‘Teach Target‘ in the ‘Path Programming‘ section of the toolbar – If a dialog pops up ignore it and proceed
- Repeat steps 4 and 5 to make more targets
- Click ‘Path‘ in the ‘Path Programming‘ to create a tool path
- In the left hand pane, under the ‘Workobjects & Targets/wobj0/wobj0_of‘ folder, drag and drop the Targets to the ‘Paths/Path_10‘ path
- Right click the ‘T_ROB1‘ in the left hand pane and select ‘Synchronize to VC…’, make sure everything is selected and hit OK
- Switch to the ‘Simulation‘ tab, and click ‘Simulation Setup‘ in the toolbar, then add the ‘Path_10‘ procedure to the ‘Main Sequence‘
- Hit the play icon in the main window
10 Steps to Add a Tool
- Go to the ‘Modeling‘ tab and click on ‘Import Geometry‘
- Click on ‘Browse for Geometry‘ to locate the 3D model of your tool (e.g. an STL file)
- Back in the ‘Modeling’ tab click on ‘Create Tool‘
- Enter the tool name, then select ‘Use Existing‘ and select the 3D model file you just imported
- The other settings can be defined if necessary, otherwise just leave them blank and click ‘Next’
- Enter the name of your TCP, or leave it as is if you only have one TCP
- Enter the position and orientation of each TCP and add it to the TCPs list, then click ‘Done‘
- In the ‘Layout‘ panel, drag and drop the newly created tool onto the ‘IRB140_5_81_01′ robot
- Click ‘No‘ on the popup to let the tool be positioned correctly on the robot
- The tool should now be on the robot, if you need to modify something, go to the ‘Home‘ tab in the ‘Paths&Targets‘ panel and locate the tool in the ‘tooldata‘ folder. Right click the tool and select ‘Modify Tooldata‘ to make changes
Example station for a dual tool (two TCPs): FutureCNCStation11-DualToolExample
Tutorial Videos
Below is a good set of official tutorials to get you started in RobotStudio.
Step 1
– Create Station
– How to navigate in RobotStudio
(1:34 min)
Step 2
– Robot jogging
– Create targets and path
(3:48 min, No Audio)
Step 3
– Import and attach tool
– Import and place geometry
(2:33 min, No Audio)
Step 4
– Create your first program
(3:05 min, No Audio)


